Showing posts with label sweet. Show all posts

Saturday, 15 August 2015

Chocolate Chip Buckwheat Cupcakes

I was having some chocolate with some multi-cereal bread earlier on today, and I noticed I really liked how the chocolate taste combined with the malty taste of some of the cereals...

Then I remembered I had those dark chocolate chips that were almost as savoury as sweet: quite some bitterness from the dark chocolate and a bit of salt (they put a bit of salt in most things to underscore the taste, but this was a bit too noticeable), and very little sweetness. I thought that they might work well with something with a malty taste, like, say... buckwheat... Which I happened to have in the closet:-)

So this is another riff on my trusty banana bread recipe (which I really should post as is sometime;-) ).

Here we go:
- 300g buckwheat flour
- 100g white flour
- 12g baking powder
- 200g white sugar
- 200ml milk
- 3 plain yoghurts (pots of 125ml)
- 3 eggs
- 70g butter
- 275g chocolate chips
(This is what I happened to have on hand, you could play around with a quantities and see what it gives you... but I really liked the result so I'm putting it on the record as is).

Prep:
1. Mix the dry ingredients (except the chocolate chips).
2. Add the wet ingredients and mix some more (tip: melt the butter in the microwave so it combines more easily with the rest).
3. Stir in the chocolate chips.
4. Preheat your oven to 200 (fan)/220, and divide the batter into your cupcake tins (I got some individual ones from my mom which are very handy since my 12-cupcakes tin doesn't fit in our small oven/microwave/grill).
5. Bake for 15-20 min (depending on your oven, ours is a bit slow so it needs 20 minutes).

Result:
These are the ones I baked (I can only fit 12 at a time in our oven). The recipe gave me about 30, I froze the rest.

Very yummy, especially right out of the oven... And quite a different taste than regular cupcakes (which are often too sweet for my taste).

The chocolate chips are at the bottom!


Thursday, 19 March 2015

Lemon Cheesecake

About a year and a half ago, I promised Kristof I'd teach him to make cheesecake, and I only got around to it this week-end (I know, shame on me!!!).

We used the lemon cheesecake recipe I always use, and which always produces a seriously yummy result (this is THE lemon cheesecake, at least according to my standards!).
The recipe is online here, but for some reason their site was down while I was shopping for ingredients (a bit of a "gaaahhh!!!" moment) so I'm posting it here too (I figure there are less chances of both sites being down).
 
Ingredients
 
For the biscuit base

        10 digestive biscuits or 20 dinosaur biscuits (which makes it even better, just use the ones without chocolate)
        75g melted butter
        1 tbsp clear honey

For the filling

        750g mascarpone cheese
        juice and zest of 2 lemons
        200g white powder sugar 

Preparation

  1. Brush the bottom of your springform cake tin with some of the melted butter (this is totally optional since this is a no-bake cheesecake). 
  2. Crush the biscuits and tip them into a bowl, add the melted butter and honey and stir until well combined. The butter and honey are what will hold the biscuits crumbs together.


    Unfortunately I can't promise that no dinosaur biscuits were harmed while making this cheesecake!


  3. Tip the mixture into the bottom of the cake tin. Level it and tap the whole surface repeatedly to make it as compact as you can. Chill in the fridge while making the filling.


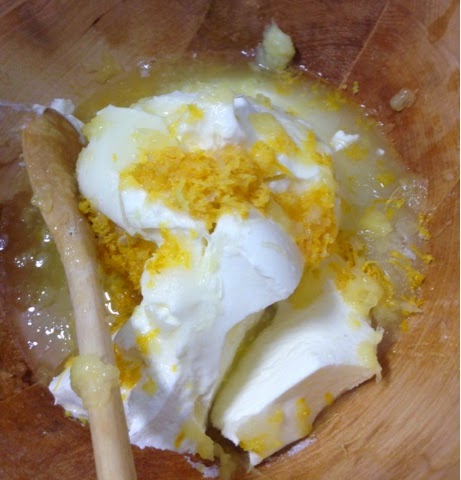
  4. For the filling, mix the mascarpone cheese, lemon juice and zest and sugar together in a bowl.


    Do not over-mix or the mascarpone will become runny (if that happens your only hope is adding gelatine like I had to do for my caramel version, which doesn't impair the taste, but of course the texture is completely different!).
  5. Spoon the mixture into the tin on top of the chilled biscuit mixture and chill in the fridge for at least 2 hours. 


  6. When ready to serve, unclasp the springform ring and ease the cheesecake out.


    And enjoy:)

Thursday, 14 August 2014

Easy and Yummy Strawberry Tart

Kristof's team takes turns to make cakes for their Show and Tell meeting, every two weeks (a great habit if you ask me!).

This week was his turn, and since I wasn't around to help (Girls' Night!), I gave him some pointers for an easy strawberry tart I made a few years ago for my birthday. Here's the recipe:

Ingredients

1 pie crust (puff pastry or shortbread)
1 basket of strawberries (about 500g)
1kg of mascarpone
vanilla sugar, to taste


Preparation

1. Unroll the crust in a pie dish, prick it all over with a fork and bake it "blind" according to the packaging's directions (in his case, that was 35min at 210 degrees Celsius).

2. Whisk the vanilla sugar into the mascarpone (Kristof used 4 packs, about 45g, but if you have more of a sweet tooth you might want to add more).

3. When the pie crust has cooled down, fill it with the mascarpone mixture and top it with strawberries.

Ta Dah!


It was yummy and disappeared quite quickly;) 
His colleagues complained that it was bad for their figure (apparently software developers are watching their figure these days!) but still went for seconds and thirds...


And here's the proud cook with his creation:


Sunday, 11 May 2014

Homemade muesli

This is more of a "look how easy it is to do this" than an actual recipe.

I once had homemade muesli in a B&B in Austria, and it was the best muesli I've ever tasted.
After a discussion with my friend/colleague/fellow foodie Shalet as to whether the oats would need to be cooked first, I decided to look it up and try it out.
I used regular oat flakes, and those are fine without prior cooking. With other types of oats (she mentioned steel cut rolled oats, which look pretty different in a google image search), I guess your mileage may vary...

So basically the idea is to just layer the ingredients (your choice of cereals, nuts, seeds, dried fruit...) in the proportions you want, shake, and you're done... 

This is what I used...
You'll probably recognise oat flakes and sunflower seeds, and the thing in the middle is a mix of dried fruits and nuts from the local supermarket (it has dried apples, apricots, cranberries and raisins, plus hazelnuts, Brazil nuts, pistachios and almonds).

So here it is:
Layer...
Shake...
And done...

And it's very yummy, much nicer than supermarket muesli that sometimes tastes a bit cardboard-y.

Sunday, 29 September 2013

American style rhubarb pie

Rhubarb is one of those things I had never come across before moving north... But the BF is a big fan of it, so I had to try it. Turns out it's alright, not the best thing ever but quite nice in a double crust pie (those American style pies they have in Mickey Mouse cartoons...).

I've made it a few times now, using this recipe.

Here's a Europe friendly (metric!) version...

Ingredients
200g sugar
25g flour
1g cinnamon
2 eggs
15g butter
500g chopped rhubarb (that was about 4 stalks for me)
2 pie crusts (I use store bought puff pastries)

Preparation
1. In a large bowl, combine the sugar, flour and cinnamon. Add the eggs and whisk until smooth. 
2. Gently stir in the rhubarb. 
3. Line a pastry case with the bottom pie crust and add the filling. Dot with butter.

4. Cover with the top pie crust and seal the edges together (the original recipe says "Trim, seal and flute edges". I've no idea what this fluting business is, but what I usually do is fold the excess top pastry under and pinch it together with the bottom pastry edge. Then press a fork on the edge to make it prettier... This works just fine).

5. Cut slits in the top pastry so air can escape while its cooking, and the top pastry doesn't go flying off... You should have something like this...
6. Stick it in an oven preheated at 205 degrees C (or 185 for a fan oven), for about 45 minutes. As for most things, keep an eye on it the last few minutes;)

And this is what you get!


Monday, 29 April 2013

Fudge

This is very easy and very yummy, but it takes a looooong time... Best attempted when you're going to be in the kitchen for a while anyway (for example making and eating dinner, then doing the washing up!).

1.5L milk
500g brown sugar
a dash of vanilla extract

1. Start warming up the milk in a saucepan on a medium-low fire.
2. Gradually whisk in the brown sugar and add the vanilla extract.
3. Keep whisking regularly while the mixture is heating up. It can bubble up gently but do not let it completely boil (you all know the milk boiling over effect, well, add stickiness from the sugar to that... Hello clean up!).
In the meantime, put some baking paper in a rectangular dish pan, covering the bottom and sides.

The mixture should reduce and thicken. This could take a while (mine took 2:30hrs!).

You know you're nearly done when it has reduced by at least 2/3, and it looks like this (skin forming on top, bubbles that look like they're coming through something solid).

4. When you start feeling some resistance while whisking, it's good to go. Pour it into the prepared pan (watch out for burning splatter!)

Casualties: no burn on my side, but I did break my whisk!

Oh, one last little tip: clean your pan and utensils immediately after you're done, and with plenty of hot water. If you let the fudge rests harden, your pan is lost!

Monday, 1 April 2013

Yummy lemon muffins

I adapted this recipe from a banana bread recipe in a "cafe food" booklet from The Australian Women's Weekly (that I randomly found in an Irish supermarket a few years ago).

Now why start from a banana bread recipe? Well I'm a beginner baker so I don't have that many recipes under my belt yet... And that one is a favourite, so one day I tried pouring the batter into a muffin tray instead, and then tried making a batch with different ingredients... And it worked:)

So here we go:
- 185g flour
- 5.5g baking powder
- 100g white sugar
- 20g butter
- 1 egg
- 50ml milk
- 2 untreated lemons
- sesame seeds (optional)

1. Preheat the oven to 220 degrees C (200 if using a fan oven) and line the muffin tins/muffin tray.
2. Mix flour and baking powder in a large bowl.
3. Rub in the butter (you can also melt it in the microwave to mix it in easier).
4. Stir in the sugar and milk.
5. Juice and zest your lemons, and add the juice and zest to the mix (watch out if you have cuts on your hands the lemon juice will burn!).
6. Spoon into the muffin tray and sprinkle with sesame seeds if desired (I did half with and half without in case somebody was allergic).
7. Bake in the oven for 15min (a little less if you want the center a little gooey).

And enjoy!

I made this for the Show&Tell meeting last week (meetings with cake are always more interesting;) ). One of my colleagues usually brings some cake, so I decided it was my turn this time (except I didn't mention it so I was one of 3 people that brought cake... So it was a very good meeting!).
It went down a treat and was all eaten:) And I got a great compliment as my colleague Gerd, who has been taking evening baking classes for a few years, asked me for the recipe:) Here's her blog about baking: Veel Afwas! (in Dutch). She's definitely not a beginner!

Here's the only picture I have (I saved mine for after the meeting as I was full from the other treats):

Thursday, 3 January 2013

Caramel Cheesecake

I made a yummy cheesecake for New Year's dinner, starting from this recipe (I've made the original lemon version twice before, and it's fab!).
Here's the modified recipe:

For the biscuit base

30 speculoos biscuits
75g butter

For the filling

750g mascarpone cheese
100g brown sugar
100ml caramel sauce (or you could replace sugar + caramel sauce by 200ml caramel, made by dissolving 200g brown sugar in 200ml water)
a pinch of cinnamon

Preparation method

1. Brush the bottom of a 23cm springform cake tin with some of the melted butter.
2. Crush the biscuits and tip them into a bowl, add the melted butter and stir until well combined.
3. Tip the mixture into the bottom of the cake tin. Using the back of a spoon, gently push the crumbs from the centre outward, until smooth and level. This will form the base of the cheesecake. Chill in the fridge while making the filling.
4. For the filling, dissolve the sugar into the caramel sauce, with a bit of water if necessary (or make the caramel).
5. Mix the caramel and the mascarpone cheese in a bowl until well combined. Do not mix the mixture too much!!
6. Spoon the mixture into the tin on top of the chilled biscuit mixture and chill in the fridge for at least 2 hours.
7. When ready to serve, unclasp the springform ring and ease out the cheesecake.

Tip

If you've over mixed the filling and ended up with "mascarpone soup" (like I did), leaving it in the fridge overnight won't help firming it up again. What you need to do is add gelatine:
1. Place 4.5 sheets of gelatine (or the appropriate quantity if you changed the amount of mascarpone, see here) under at least 3/4L of cold water in a bowl and leave it for 5 min.
2. Pat the gelatine dry.
3. Place it in a small quantity of warm water in a pot (I used about 100ml), and dissolve on low fire (don't bring to the boil).
4. Take off the fire and gradually add the filling to the gelatine (not the opposite - I don't know why this matters but apparently it does!).
5. Leave it to cool in the fridge for 2 hours (I put it in an ice bath before putting it in the fridge).
6. Tip it into the springform tin over the biscuit base (the filling should now be firm enough to not run everywhere), and smooth it with a spatula.
7. Leave it to chill for at least another 2 hours. And this should save your cheesecake without compromising the taste:)

Little note: During this whole operation I somehow got cheesecake in my hair! (of course this was right after washing my hair...). How does Brie Van De Kamp do it? ;)

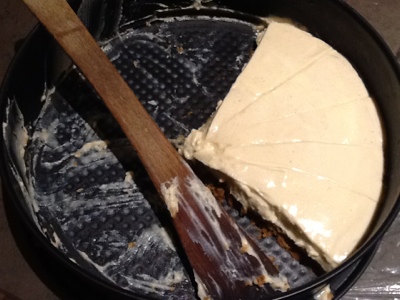
I forgot to take a picture of the complete cheesecake, so here's what's left:

Sunday, 26 February 2012

Jeroen Meus's Apple Crumble

Jeroen Meus is one of the local celebrity chefs, much raved about by the BF's mom. His specialty is making traditional Flemish food simple so that people can cook it in the work week.

I'm usually not much of a fan, as I've the same beef with Flemish food as with most "northern" food: too heavy, over-reliance on meat and potatoes, and (this one might be specifically Flemish) sauce overkill.
Our work canteen (with serves a canteen -read bad- version of traditional Flemish food) is no stranger to serving as many as 3 sauces in/on top of a single dish, not counting all the mayonnaise&co sauces you can add yourself...
Don't get me wrong, the Flemish/Belgians have some yummy dishes too (vol au vent, stoverij and waterzooi come to mind, and of course their world famous chocolate, fries, mussels, beer, speculaas...).

So anyway, I had never been inclined to try one of Jeroen Meus' recipes... Until he made apple crumble! Now that's not typically Flemish, but I suppose he wanted to introduce a bit of variation...

Here is the original recipe (in Dutch). I followed it pretty much exactly except for removing a few bits and bobs I didn't like (raisins, cardamom, star aniseed).

Here's a translation:

Ingredients for 4 servings:

For the crumble:
125 g flour
100 g oat flakes
115 g butter
100 g sugar
1 pinch of cinnamon powder

For the apple mix:
4 apples
3 tablespoons of brown sugar (yes I know he's mixing metric and imperial... I just sprinkled some brown sugar over the cut apples)
A slog of rum (he used rum to rehydrate the raisins, but since I wasn't using raisins, I figured I'd just add it to the apples)

Serving suggestion:

With 1 scoop of speculaas ice cream per person (speculaas ice cream is made from speculaas biscuits and is veeerrryyy good, but I just didn't have any...).

Preparation:

1. Dice the (cold) butter.
2. In a mixing bowl, combine the flour, the oat flakes, the sugar and the diced butter.
Add a pinch of cinnamon and mix with your hands until you get a crumbly dough.


3. Preheat the oven to 200°C.
4. Peel and core the apples. Cut into chunks.
5. Butter an oven dish, place the apples in it and stir the brown sugar in the apples.
6. Add the crumbly dough evenly over the apples and bake for 25-30 min.


Verdict:

Pretty good, but a few things to tweak for next time:
- use less sugar in the crumble dough (it was too sweet for my taste)
- either cut the apples chunks smaller, or use a lower temperature and bake for longer (the apples were just about cooked while the crumble was browning a bit).

Damn, now I feel like apple crumble again :S

Wednesday, 7 December 2011

Gâteau au Yaourt (Yoghurt Cake)

This is a childhood favourite... and the only thing I could bake until recently:-D
It's dead easy, I'd say "suitable for ages 6 and up";-)
You don't even need a kitchen scale or measuring cup as everything is measured in a yoghurt pot...

I usually follow this French recipe. Here's an English translation:
  • 1 yoghurt
  • 2 (yoghurt) pots of flour
  • 2 pots of sugar
  • ½ pot of sunflower oil (or melted butter)
  • 3 eggs
  • ½ pack (5.5 g) of baking powder
  • 1 pack (11 g) of vanilla sugar (optional)
 Preparation:

1. Preheat the oven at 200-220° C.
2. Pour the yoghurt in a mixing bowl.
3. Clean the yoghurt pot and use it as measure to add the rest of the ingredients to the bowl.
4. Mix well.
5. Butter your dish, pour the dough and bake in the oven for about 30 min.
To check whether it's cooked, stick a knife in the thickest part. If it comes out clean (wet but with no dough on it counts as clean), the cake is ready!

Sunday, 2 October 2011

Brood Pudding (Bread Pudding)

On Friday I discovered that the "healthy" biscuits I eat for breakfast on workdays have 450 kcal/100g, which is about as much as chocolate!!! Tiny shock of the day!!
So I decided to make cake for breakfast instead!! It feels decadent, but can't actually be worse calorie-wise (I'm talking about the wholesome straight-from-your-childhood home-made variety, not the colorful-and-sugary type...).

I was going to make my trusted "gâteau au yaourt" (yoghurt cake), but when I got home I saw a loaf of bread that was going to expire today. So I decided to go for a "brood pudding" (a Belgian classic that turns old bread into comforting yumminess).
It's the first time I'm making this, but I think it turned out pretty OK - I'm not sure if the texture is 100% right, but the taste is amazing!! And that's what matters, right? ;)

I used a recipe from broodpudding.be, and adapted it for the ingredients I had, that is:

- 300g multi-cereal bread
- 60g liquid margarine (margarine in a bottle for cooking and baking - I find that a lot easier to work with than a chunk of butter, although it doesn't smell great)
- 150g brown sugar (as part of this I used some cinnamon sugar I got as a gift from my sister, but you can just use plain brown sugar and add some cinnamon)
- 3 eggs
- a handful of sultanas
- vanilla extract
- a little honey


So this is how you go about it:

1. Cut or tear the bread into pieces and soak them in water (the original recipe said water, I'm sure milk would be better but I just didn't have any).
2. Mix the liquid margarine, sugar, eggs, honey and a dash of vanilla extract. Add the sultanas and mix some more.
3. Drain the bread, add it to the sugar mix and stir well. It doesn't need to be completely homogeneous but you shouldn't be able to see the bread color anywhere.
4. Preheat the oven to 150 degrees.
5. Butter a baking dish and pour the bread mix in it.
6. Cook for 60 min. A crust will form but it will still be pretty soft inside.

So here's what it looks like:


And it's yummy :-)