Showing posts with label comfort food. Show all posts

Saturday, 15 August 2015

Chocolate Chip Buckwheat Cupcakes

I was having some chocolate with some multi-cereal bread earlier on today, and I noticed I really liked how the chocolate taste combined with the malty taste of some of the cereals...

Then I remembered I had those dark chocolate chips that were almost as savoury as sweet: quite some bitterness from the dark chocolate and a bit of salt (they put a bit of salt in most things to underscore the taste, but this was a bit too noticeable), and very little sweetness. I thought that they might work well with something with a malty taste, like, say... buckwheat... Which I happened to have in the closet:-)

So this is another riff on my trusty banana bread recipe (which I really should post as is sometime;-) ).

Here we go:
- 300g buckwheat flour
- 100g white flour
- 12g baking powder
- 200g white sugar
- 200ml milk
- 3 plain yoghurts (pots of 125ml)
- 3 eggs
- 70g butter
- 275g chocolate chips
(This is what I happened to have on hand, you could play around with a quantities and see what it gives you... but I really liked the result so I'm putting it on the record as is).

Prep:
1. Mix the dry ingredients (except the chocolate chips).
2. Add the wet ingredients and mix some more (tip: melt the butter in the microwave so it combines more easily with the rest).
3. Stir in the chocolate chips.
4. Preheat your oven to 200 (fan)/220, and divide the batter into your cupcake tins (I got some individual ones from my mom which are very handy since my 12-cupcakes tin doesn't fit in our small oven/microwave/grill).
5. Bake for 15-20 min (depending on your oven, ours is a bit slow so it needs 20 minutes).

Result:
These are the ones I baked (I can only fit 12 at a time in our oven). The recipe gave me about 30, I froze the rest.

Very yummy, especially right out of the oven... And quite a different taste than regular cupcakes (which are often too sweet for my taste).

The chocolate chips are at the bottom!


Thursday, 19 March 2015

Lemon Cheesecake

About a year and a half ago, I promised Kristof I'd teach him to make cheesecake, and I only got around to it this week-end (I know, shame on me!!!).

We used the lemon cheesecake recipe I always use, and which always produces a seriously yummy result (this is THE lemon cheesecake, at least according to my standards!).
The recipe is online here, but for some reason their site was down while I was shopping for ingredients (a bit of a "gaaahhh!!!" moment) so I'm posting it here too (I figure there are less chances of both sites being down).
 
Ingredients
 
For the biscuit base

        10 digestive biscuits or 20 dinosaur biscuits (which makes it even better, just use the ones without chocolate)
        75g melted butter
        1 tbsp clear honey

For the filling

        750g mascarpone cheese
        juice and zest of 2 lemons
        200g white powder sugar 

Preparation

  1. Brush the bottom of your springform cake tin with some of the melted butter (this is totally optional since this is a no-bake cheesecake). 
  2. Crush the biscuits and tip them into a bowl, add the melted butter and honey and stir until well combined. The butter and honey are what will hold the biscuits crumbs together.


    Unfortunately I can't promise that no dinosaur biscuits were harmed while making this cheesecake!


  3. Tip the mixture into the bottom of the cake tin. Level it and tap the whole surface repeatedly to make it as compact as you can. Chill in the fridge while making the filling.


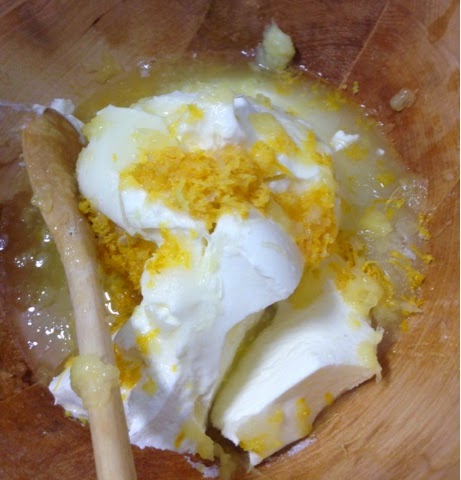
  4. For the filling, mix the mascarpone cheese, lemon juice and zest and sugar together in a bowl.


    Do not over-mix or the mascarpone will become runny (if that happens your only hope is adding gelatine like I had to do for my caramel version, which doesn't impair the taste, but of course the texture is completely different!).
  5. Spoon the mixture into the tin on top of the chilled biscuit mixture and chill in the fridge for at least 2 hours. 


  6. When ready to serve, unclasp the springform ring and ease the cheesecake out.


    And enjoy:)

Tuesday, 4 November 2014

"Get Well Soon" Chicken Soup


I'm stuck at home with a gastro-enteritis, or as they call it here, "stomach flu".

Unfortunately this is something I tend to get quite a bit (at least once every 2 years, so probably every time there's an epidemic!).
The silver lining is that by now I know how to deal with it! The formula is: lots of rest, lots of water, and only light and "safe" food. That means nothing with fat, too much fibre or spice, basically nothing that can irritate your digestive system further...
The best thing being a nice homemade chicken soup (alternating with some good natural yoghurt for breakfast or tea time).

The soup in the picture above has (for a big pot):
4 carrots 
2 leeks
5 small potatoes
about 600g chicken
about 2l water
2 stock cubes
thyme

The only trick here is to add the ingredients according to their cooking time: so first the carrots while you chop the rest of the veggies, then the potatoes, then a bit afterwards the leeks then the chicken.

Note: I'm going for the chicken being tender because it's cooked but not over cooked, as opposed to boiling the heck out of it then simmering for hours to get it tender again. If you want to do that, obviously put in the chicken first then the veggies a good bit later, otherwise they'll be very very limp...

Note 2: If you're worried about not being sure the chicken is cooked through, split the biggest chicken piece to confirm it is, then leave it on another couple of minutes anyway for good measure (if the fire is low and it's only a few minutes extra it won't toughen up too much).

So that was Chicken Soup #1, here's Chicken Soup #2:


This one has:
4 carrots 
2 leeks
100g baby corn
about 600g chicken
a few black Asian mushrooms (didn't see the type on the packaging)
300g rice vermicelli
about 1cm ginger root
about 2l water
2 stock cubes
a small splash of soy sauce

It was also yummy and comforting (and Kristof was happy I had to skip the chilli  peppers this time!).

Of course this all supposes you are not too sick to cook. If you are, maybe you can point your nearest loved one to this page so they can make it for you?:)
And if they need a little bribe, maybe you can promise to make them some muffins or a strawberry tart later in return...

Friday, 31 October 2014

Delicious Pumpkin Soup

This is by far my favourite soup... soft and creamy and comforting... 
It requires a bit of work peeling and cutting the pumpkin, but I think it's really worth it, and the rest is dead easy.

Ingredients
1 small pumpkin or 1/4 of a big pumpkin (jack 'o lantern type)
3 carrots
2 onions
200ml cream
2 stock cubes (or amount needed for 1l of water)

Preparation
1. Peel the pumpkin, remove the seeds and dice it in rough chunks (you're already over the hard part!), add the carrots and onions.

2. Crumble the stock cubes on top of it, add 1 liter of water, and cook until the vegetables are softened (especially the carrots).

3. Add the cream and blend into a soup.
(Optional: decorate with herbes de Provence, seeds, Parmesan, or whatever takes your fancy!)

A cereal/seeds bread is nice to have with it...


Monday, 11 March 2013

Chicken noodle soup

I made noodle soup for scratch:) I started with a recipe my lil' sis gave for "cold-fighting Asian soup" (since the BF has a cold/flu thing at the moment, I thought I'd try it...).

So the recipe goes like this: "boil some water with some lemon, ginger and miso soup, add small pieces of chicken and carrots, and a bit of chilli to clear up the nose!" Sounded yummy and, well, useful!

Of course I can never leave a recipe alone, so I added a few bits and bobs from the fridge and pantry...

My version used:
about 2L water
1 carrot
half a red bell pepper
a quarter fennel
2 small shallots
2 red chillies
4 packs dried miso soup (48g)
1 pack chicken soup base + flavouring oil (that came with the noodles)
a generous helping of ginger
3 packs of noodles (individual portions)
some oyster sauce
some soy sauce
about 300g chicken, diced into small pieces
4 eggs
lots of lime juice
a dash of Chinese 5 spices
some fish sauce
some toasted sesame oil

Yes I know that's a lot of bits and bobs but I tend to be enthusiastic about making food I like!

So basically I just diced the veggies, put them in boiling water, added the soup bases, spices, and noodles... Then the chicken, more spices and the eggs at the end.
Little tip for the eggs: beat them and spread them around the soup. I just cracked them above the pot and then I had to try fish around for them to break them into smaller pieces and make sure the yolk was cooked :S

So how did it taste? Really good, like proper Asian soup!

So I served some to the BF with a spoon and chopsticks, and the first thing he did was change the chopsticks for a knife and fork, and CUT THE NOODLES IN THE SOUP!!! *sigh*

Ah well, at least I made plenty so I can freeze some for later (hopefully that freezes well).

Thursday, 3 January 2013

Caramel Cheesecake

I made a yummy cheesecake for New Year's dinner, starting from this recipe (I've made the original lemon version twice before, and it's fab!).
Here's the modified recipe:

For the biscuit base

30 speculoos biscuits
75g butter

For the filling

750g mascarpone cheese
100g brown sugar
100ml caramel sauce (or you could replace sugar + caramel sauce by 200ml caramel, made by dissolving 200g brown sugar in 200ml water)
a pinch of cinnamon

Preparation method

1. Brush the bottom of a 23cm springform cake tin with some of the melted butter.
2. Crush the biscuits and tip them into a bowl, add the melted butter and stir until well combined.
3. Tip the mixture into the bottom of the cake tin. Using the back of a spoon, gently push the crumbs from the centre outward, until smooth and level. This will form the base of the cheesecake. Chill in the fridge while making the filling.
4. For the filling, dissolve the sugar into the caramel sauce, with a bit of water if necessary (or make the caramel).
5. Mix the caramel and the mascarpone cheese in a bowl until well combined. Do not mix the mixture too much!!
6. Spoon the mixture into the tin on top of the chilled biscuit mixture and chill in the fridge for at least 2 hours.
7. When ready to serve, unclasp the springform ring and ease out the cheesecake.

Tip

If you've over mixed the filling and ended up with "mascarpone soup" (like I did), leaving it in the fridge overnight won't help firming it up again. What you need to do is add gelatine:
1. Place 4.5 sheets of gelatine (or the appropriate quantity if you changed the amount of mascarpone, see here) under at least 3/4L of cold water in a bowl and leave it for 5 min.
2. Pat the gelatine dry.
3. Place it in a small quantity of warm water in a pot (I used about 100ml), and dissolve on low fire (don't bring to the boil).
4. Take off the fire and gradually add the filling to the gelatine (not the opposite - I don't know why this matters but apparently it does!).
5. Leave it to cool in the fridge for 2 hours (I put it in an ice bath before putting it in the fridge).
6. Tip it into the springform tin over the biscuit base (the filling should now be firm enough to not run everywhere), and smooth it with a spatula.
7. Leave it to chill for at least another 2 hours. And this should save your cheesecake without compromising the taste:)

Little note: During this whole operation I somehow got cheesecake in my hair! (of course this was right after washing my hair...). How does Brie Van De Kamp do it? ;)

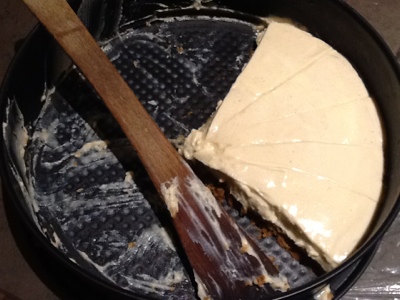
I forgot to take a picture of the complete cheesecake, so here's what's left:

Sunday, 26 February 2012

Jeroen Meus's Apple Crumble

Jeroen Meus is one of the local celebrity chefs, much raved about by the BF's mom. His specialty is making traditional Flemish food simple so that people can cook it in the work week.

I'm usually not much of a fan, as I've the same beef with Flemish food as with most "northern" food: too heavy, over-reliance on meat and potatoes, and (this one might be specifically Flemish) sauce overkill.
Our work canteen (with serves a canteen -read bad- version of traditional Flemish food) is no stranger to serving as many as 3 sauces in/on top of a single dish, not counting all the mayonnaise&co sauces you can add yourself...
Don't get me wrong, the Flemish/Belgians have some yummy dishes too (vol au vent, stoverij and waterzooi come to mind, and of course their world famous chocolate, fries, mussels, beer, speculaas...).

So anyway, I had never been inclined to try one of Jeroen Meus' recipes... Until he made apple crumble! Now that's not typically Flemish, but I suppose he wanted to introduce a bit of variation...

Here is the original recipe (in Dutch). I followed it pretty much exactly except for removing a few bits and bobs I didn't like (raisins, cardamom, star aniseed).

Here's a translation:

Ingredients for 4 servings:

For the crumble:
125 g flour
100 g oat flakes
115 g butter
100 g sugar
1 pinch of cinnamon powder

For the apple mix:
4 apples
3 tablespoons of brown sugar (yes I know he's mixing metric and imperial... I just sprinkled some brown sugar over the cut apples)
A slog of rum (he used rum to rehydrate the raisins, but since I wasn't using raisins, I figured I'd just add it to the apples)

Serving suggestion:

With 1 scoop of speculaas ice cream per person (speculaas ice cream is made from speculaas biscuits and is veeerrryyy good, but I just didn't have any...).

Preparation:

1. Dice the (cold) butter.
2. In a mixing bowl, combine the flour, the oat flakes, the sugar and the diced butter.
Add a pinch of cinnamon and mix with your hands until you get a crumbly dough.


3. Preheat the oven to 200°C.
4. Peel and core the apples. Cut into chunks.
5. Butter an oven dish, place the apples in it and stir the brown sugar in the apples.
6. Add the crumbly dough evenly over the apples and bake for 25-30 min.


Verdict:

Pretty good, but a few things to tweak for next time:
- use less sugar in the crumble dough (it was too sweet for my taste)
- either cut the apples chunks smaller, or use a lower temperature and bake for longer (the apples were just about cooked while the crumble was browning a bit).

Damn, now I feel like apple crumble again :S

Wednesday, 7 December 2011

Gâteau au Yaourt (Yoghurt Cake)

This is a childhood favourite... and the only thing I could bake until recently:-D
It's dead easy, I'd say "suitable for ages 6 and up";-)
You don't even need a kitchen scale or measuring cup as everything is measured in a yoghurt pot...

I usually follow this French recipe. Here's an English translation:
  • 1 yoghurt
  • 2 (yoghurt) pots of flour
  • 2 pots of sugar
  • ½ pot of sunflower oil (or melted butter)
  • 3 eggs
  • ½ pack (5.5 g) of baking powder
  • 1 pack (11 g) of vanilla sugar (optional)
 Preparation:

1. Preheat the oven at 200-220° C.
2. Pour the yoghurt in a mixing bowl.
3. Clean the yoghurt pot and use it as measure to add the rest of the ingredients to the bowl.
4. Mix well.
5. Butter your dish, pour the dough and bake in the oven for about 30 min.
To check whether it's cooked, stick a knife in the thickest part. If it comes out clean (wet but with no dough on it counts as clean), the cake is ready!

Thursday, 3 November 2011

Savoury Turnovers

I love savoury pastries... Quiche, steak&kidney pie, pot pie, pizza, petits fours... Love them all, and they make great comfort food!

Yesterday night I tried to make turnovers, based on a recipe from realsimple.com (didn't know the name, just recognized it as yummy stuff from the photo!).

So my version included (for 4 turnovers):
- 2 store-bought pie crusts (the puff pastry kind)
- 350g beef&pork mince (I used 450g, but I found that was a bit much) - it would work well with 100% beef mince as well
- 2 carrots
- 4 shallots
- 250g fresh spinach (which is really a lot nicer than the canned version imo)
- 50g parmesan (add more if you want it really cheesy, I just wanted a hint of taste)
- 1 egg
- some rosemary
- salt & pepper

So here's how you go about it:
1. Slice the carrots and soften them in a bit of olive oil. Let them color a little.
2. Slice the shallots and add them to the pan. Season with rosemary. It will start smelling very good:)
3. Add the spinach little by little, and stir well each time.
4. When the vegs are cooked but still crunchy, transfer to a big mixing bowl and put the meat in the pan.
Season with salt and pepper (skip the salt if you're going to use a lot of parmesan, as it'll get too salty otherwise), and cook through.
5. While it's cooking, preheat the oven to 200 degrees celsius.
6. Add the cooked meat and the parmesan to the mixing bowl. Correct the seasoning if needed.
7. Cut the pie crusts in 2, spoon the meat&veg mix onto one side of each half-circle, leaving a 1cm border.
8. Wet the borders with a little water, fold the dough over to form a quarter-circle, and press firmly to seal (I crimped it with my fingers).
Cut 3 slits in each turnover.
9. Beat the egg and brush it over the turnovers (so they get nice and golden in the oven).
Transfer to a baking sheet with baking paper (I used the baking paper that came with the pie crusts) and cook for 15min (or until risen and golden brown).

There you go :)

Sunday, 2 October 2011

Brood Pudding (Bread Pudding)

On Friday I discovered that the "healthy" biscuits I eat for breakfast on workdays have 450 kcal/100g, which is about as much as chocolate!!! Tiny shock of the day!!
So I decided to make cake for breakfast instead!! It feels decadent, but can't actually be worse calorie-wise (I'm talking about the wholesome straight-from-your-childhood home-made variety, not the colorful-and-sugary type...).

I was going to make my trusted "gâteau au yaourt" (yoghurt cake), but when I got home I saw a loaf of bread that was going to expire today. So I decided to go for a "brood pudding" (a Belgian classic that turns old bread into comforting yumminess).
It's the first time I'm making this, but I think it turned out pretty OK - I'm not sure if the texture is 100% right, but the taste is amazing!! And that's what matters, right? ;)

I used a recipe from broodpudding.be, and adapted it for the ingredients I had, that is:

- 300g multi-cereal bread
- 60g liquid margarine (margarine in a bottle for cooking and baking - I find that a lot easier to work with than a chunk of butter, although it doesn't smell great)
- 150g brown sugar (as part of this I used some cinnamon sugar I got as a gift from my sister, but you can just use plain brown sugar and add some cinnamon)
- 3 eggs
- a handful of sultanas
- vanilla extract
- a little honey


So this is how you go about it:

1. Cut or tear the bread into pieces and soak them in water (the original recipe said water, I'm sure milk would be better but I just didn't have any).
2. Mix the liquid margarine, sugar, eggs, honey and a dash of vanilla extract. Add the sultanas and mix some more.
3. Drain the bread, add it to the sugar mix and stir well. It doesn't need to be completely homogeneous but you shouldn't be able to see the bread color anywhere.
4. Preheat the oven to 150 degrees.
5. Butter a baking dish and pour the bread mix in it.
6. Cook for 60 min. A crust will form but it will still be pretty soft inside.

So here's what it looks like:


And it's yummy :-)

Monday, 5 September 2011

Very Simple Courgette Soup

I made this on Friday night, it's comfort food but healthy... and easy to make too!

You will need:
- 2 courgettes
- 1 broccoli
- 1 big onion
- 75 cl water
- a stock cube

Preparation:
1. Boil the water and dissolve the stock cube.
2. Wash, peel and dice the courgettes (big chunks are ok but they should be roughly the same size).
Add them to the boiling water.
3. Peel and cut the onion (wet it and the knife regularly to avoid those pesky onion tears!).
Add it to the boiling water.
4. Wash the broccoli and cut the florets.
Add them to the water and discard the rest.
5. Let everything cook for 5-10 min.
6. Blitz the veg and water in a blender (I have a tiny blender so I did it in batches).
Taste, season and serve!!!

Told you it was easy;)

Yummy Cheese and Chive Biscuits

I found this recipe on The Purple Foodie.
It's a-ma-zing!!! I'm no baking whizz, but these turned out perfect the first time around... which means there will definitely be a second time;)

The only thing I changed is I replaced the cheddar, garlic powder and parsley by emmental, parmesan and chives (so for the same quantities as the original recipe, that was 100g emmental, a few handful of parmesan flakes, about 25g, and about half the contents of my dried chives shaker, so 2-3g, a third of that reserved to add to the melted butter to drizzle on the biscuits at the end).

We had a few right out of the oven, and it was very very difficult to eat only a few, even on a full stomach... I brought the rest to lunch the next day and reheated it in the microwave for my colleagues... I was still very good, although not as fantastic as right out of the oven.

I'm actually salivating just thinking about it... I'll definitely be making this again!!!