Wednesday, 17 February 2016

Pissaladière

Pronounced "pea-salad-year", it's a cousin of pizza from Nice, so quite a nostalgic food for me. 
You can get it everywhere over there (bakeries, supermarkets, street stalls...), but no hope of ever finding it here... Luckily, it's quite easy to make:)

Ingredients (for 1 big/2 small pissaladières)
For the dough:
250g self raising flour 
150ml water
a pinch of salt 
a generous drizzle of olive oil
For the topping:
7 medium sized onions 
a few anchovies 
a few black olives 
thyme 
balsamic vinegar 

Preparation 
1. Slice the onions and sauté them in olive oil with plenty of thyme. You want to first put them on high heat to brown them a bit, then add a slog of balsamic vinegar and reduce to medium low, still stirring regularly.

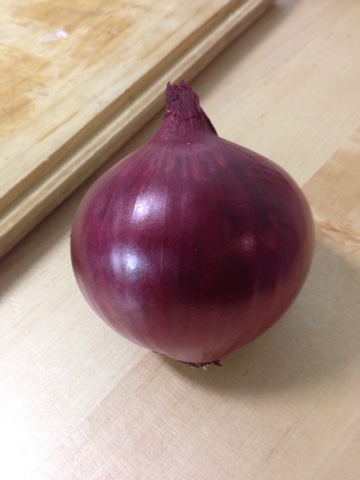
Traditionally, pissaladière is made with white onions, but I couldn't resist this beautiful color:


2. While the onions are gently reducing, we're going to make the dough. Mix the flour, salt, water and olive oil into an homogenous ball.

I do it with a stand mixer and dough hook, but it would work just fine by hand.


3. Flour a work surface and roll the dough into shape (I make 2 small ones because we have a small oven). In a pinch, you can use a clean wine bottle as a rolling pin.


4. Once the onions are ready, spread them on the dough (leaving a little border), and add the black olives and anchovies.


5. Bake at 200C for 15 min (up to 25 if you have a slow oven), and enjoy!!!


For example i
t goes very well with a side salad of mixed leaves, cherry tomatoes and yellow bell pepper...


Friday, 1 January 2016

Happy New Year :-)

2015 was a great year :-) For a lot of reasons, big and small, but there was definitely a pretty big one: we got married!!! :-)


It all went pretty fast actually: we got engaged last May, and since we wanted decent weather for our wedding, we had to decide between trying to organise it in the autumn before it got cold, or wait until the end of the spring next year.

Neither of us is very patient, and there are few things that dial the anticipation up to 11 like getting married:-)
Also, after thinking about it, we figured the more time we had to plan it, the bigger it would become and the more it would take over our life (and our savings!).
So the autumn it was.

So we kinda buried ourselves in wedding planning and dropped off the face of the Earth for a while, but it was all worth it:-) We had an amazing day, and it was great to be surrounded by family and friends!

More details some other time, but for now, here's hoping 2016 is at least as great as 2015:-) Happy New Year everyone!!!

Saturday, 15 August 2015

Chocolate Chip Buckwheat Cupcakes

I was having some chocolate with some multi-cereal bread earlier on today, and I noticed I really liked how the chocolate taste combined with the malty taste of some of the cereals...

Then I remembered I had those dark chocolate chips that were almost as savoury as sweet: quite some bitterness from the dark chocolate and a bit of salt (they put a bit of salt in most things to underscore the taste, but this was a bit too noticeable), and very little sweetness. I thought that they might work well with something with a malty taste, like, say... buckwheat... Which I happened to have in the closet:-)

So this is another riff on my trusty banana bread recipe (which I really should post as is sometime;-) ).

Here we go:
- 300g buckwheat flour
- 100g white flour
- 12g baking powder
- 200g white sugar
- 200ml milk
- 3 plain yoghurts (pots of 125ml)
- 3 eggs
- 70g butter
- 275g chocolate chips
(This is what I happened to have on hand, you could play around with a quantities and see what it gives you... but I really liked the result so I'm putting it on the record as is).

Prep:
1. Mix the dry ingredients (except the chocolate chips).
2. Add the wet ingredients and mix some more (tip: melt the butter in the microwave so it combines more easily with the rest).
3. Stir in the chocolate chips.
4. Preheat your oven to 200 (fan)/220, and divide the batter into your cupcake tins (I got some individual ones from my mom which are very handy since my 12-cupcakes tin doesn't fit in our small oven/microwave/grill).
5. Bake for 15-20 min (depending on your oven, ours is a bit slow so it needs 20 minutes).

Result:
These are the ones I baked (I can only fit 12 at a time in our oven). The recipe gave me about 30, I froze the rest.

Very yummy, especially right out of the oven... And quite a different taste than regular cupcakes (which are often too sweet for my taste).

The chocolate chips are at the bottom!


Tuesday, 5 May 2015

Mini woolly hat with pom-pom


Not really the season anymore I know, but I'm gradually learning more knitting skills... This helped me practice the purl stitch, and learn decreases (knit 2 together and purl 2 together... which do what they say on the tin).

The pom-pom - which turned out super duper fluffy if I may say so myself - I knew how to make from kids camps years ago. Basically you only need a bit of cardboard, yarn and a needle (no need for a pom-pom maker!).
You can find a tutorial here (I didn't bother measuring the circles, I just eyeballed it).

So why a mini hat? Well there's this campaign every year where they put mini woolly hats on smoothie bottles and give a fraction of the profits to charity (original UK version here).
Here are two from smoothies I bought in January:

I really like the red one. The cream one kinda looks more like a condom, but hey it's possible that it was the idea...

Anyway, I thought it was kinda cool, and since they've published knitting patterns for people to make them, I thought I'd try my hand at the beginners' one:)

If someone else fancies giving it a try, it's the first one on this page (that one's in French, though you can find a pretty similar one on the UK website).

I'm really hoping they run the same campaign again this autumn, so I can send it in... And it'd be really cool to spot it on a smoothie on the shelves;)


Sunday, 12 April 2015

Roasted Sea Bass with Minneola

You probably read this as "Roasted Sea Bass with... What?". You're not alone. I also hadn't heard of minneola before making this.

Basically a minneola is one of these new citrus fruits made by crossing other citrus. This one is a cross between a grapefruit and a tangerine. And it is closest to the tangerine (it looks like a small orange but is sweeter and juicier).

So the "inspiration recipe" is something I found on my laptop (I bought a new laptop with Windows 8, that has "tiles" with different kind of things, one of them being food and drink, with recipes. I was quite chuffed to find that my new laptop came with a collection of recipes!!). 

It was sea bass with herb butter sauce and lemon, and looked scrumptious. So we decided to make a version of that. Kristof thought it was with orange, so he brought a minneola back from the shop (and I'm glad he did, that definitely made it more interesting:) ).

Ingredients 

2 filets of sea bass
1 minneola 
fresh pasta (we used 500g but that was a bit too much, so I'd say 300g)
200-300g fresh spinach 
olive oil 
oregano
ras-el-hanout

Preparation 

1. Slice the minneola as finely as possible, make indentations in the fish and place the slices in the indentations. Place a few more slices under the fish, and nibble on the remaining slices, they're really yummy;)
Add some olive oil, oregano and ras-el-hanout on the fish and minneola slices.

2. Roast the fish and minneola at 200 degrees Celsius for 20 minutes.

3. Cook the fresh pasta, stir-fry the spinach, put everything nicely on plates, and enjoy:)

P.S. Putting everything nicely on plates is Kristof's job here, since he's better at it than I am ;)


Friday, 20 March 2015

Squid Ink Pasta with Seafood in White Wine Sauce

So I wanted to:
- make ink squid pasta with actual squid,
- add some big prawns (gambas),
- try to make a white wine sauce.

Here's the result:


You can't see much of the white wine sauce (I only added it to the pasta then piled the rest on top, since the pot and pans I used were not big enough to stir everything through), but it worked very well!

I used this this recipe for it, and I flavoured it with shallots, sundried tomatoes, oregano and lemon olive oil (also a few drops of Asian fish sauce and mango vinegar).

I also added some leek, green peas and yellow bell pepper. It was really nice:)


Thursday, 19 March 2015

Lemon Cheesecake

About a year and a half ago, I promised Kristof I'd teach him to make cheesecake, and I only got around to it this week-end (I know, shame on me!!!).

We used the lemon cheesecake recipe I always use, and which always produces a seriously yummy result (this is THE lemon cheesecake, at least according to my standards!).
The recipe is online here, but for some reason their site was down while I was shopping for ingredients (a bit of a "gaaahhh!!!" moment) so I'm posting it here too (I figure there are less chances of both sites being down).
 
Ingredients
 
For the biscuit base

        10 digestive biscuits or 20 dinosaur biscuits (which makes it even better, just use the ones without chocolate)
        75g melted butter
        1 tbsp clear honey

For the filling

        750g mascarpone cheese
        juice and zest of 2 lemons
        200g white powder sugar 

Preparation

  1. Brush the bottom of your springform cake tin with some of the melted butter (this is totally optional since this is a no-bake cheesecake). 
  2. Crush the biscuits and tip them into a bowl, add the melted butter and honey and stir until well combined. The butter and honey are what will hold the biscuits crumbs together.


    Unfortunately I can't promise that no dinosaur biscuits were harmed while making this cheesecake!


  3. Tip the mixture into the bottom of the cake tin. Level it and tap the whole surface repeatedly to make it as compact as you can. Chill in the fridge while making the filling.


  4. For the filling, mix the mascarpone cheese, lemon juice and zest and sugar together in a bowl.


    Do not over-mix or the mascarpone will become runny (if that happens your only hope is adding gelatine like I had to do for my caramel version, which doesn't impair the taste, but of course the texture is completely different!).
  5. Spoon the mixture into the tin on top of the chilled biscuit mixture and chill in the fridge for at least 2 hours. 


  6. When ready to serve, unclasp the springform ring and ease the cheesecake out.


    And enjoy:)

Sunday, 15 March 2015

I can haz purl stitch!

I've started teaching myself to knit a good two years ago, in which time I've made... hmm... three scarves.
Even less impressive is that I never managed to get my head around the purl stitch... Until recently that is...

I Hereby Proudly Present My First Successful Attempt at Purl Stitch:

The idea behind this was to make a scarf that wouldn't "grow" too much, as my first scarf (that I still wear all the time) is now a good bit longer than it was originally (I could wrap it twice around my neck, now after 3 times it's still a bit loose). My mum said it's normal with garter stitch...

It's long enough to almost touch the floor when hung from a bar stool!

The thing is, stockinette stitch has another problem: it curls up on itself!

So I still ended up frogging (= unraveling) it and starting again in garter stitch. Ah well...
At some point I'll master more stitches;)

Saturday, 28 February 2015

Hello Again!!

So, yes, I'm back. I was in winter sleep, kind of...
Winter sleep + work stress + getting sick quite a bit + back problems + apartment trouble (the boiler -yes the thing that controls both heating and hot water- decided to malfunction on us at the end of January. 3 pretty glacial days ensued).

Things are starting to get better now, and we are actually having a few rays of sunshine again and days are becoming less ridiculously short, so I might start to emerge from winter sleep:-)

I might even post a few recipes or sewing projects;-)

Roast Beef Sandwich with Green Tea Extract!?

I just had a roast beef sandwich from the store, and had a look at the ingredients...

This says: "béarnaise dressing (rapeseed oil, vinegar, mustard (water, mustard seeds, vinegar, salt, turmeric), sugar, water, tarragon, egg yolk, natural extracts, herbs, food colouring E160a, salt, onion powder, green tea extract, antioxidant E392, preservative E202, thickener E415, acidifying agent E330)".

So, erm... Why do they need green tea extract in béarnaise sauce? I mean, it's probably better for you than all the Es, but so is chocolate, and I hope that wasn't on the shortlist of ingredients!
Maybe the recipe was optimised by a computer...

Sunday, 9 November 2014

Red mullet with fennel, couscous and black olives


Kristof made this for me yesterday:) I had shown him out to make something like that once or twice before, and he did a great job!
Plus, this was not long after being able to eat only soup and yoghurt for 3 days due to gastro-enteritis, so it was really appreciated!

Basically what you need to do:
1. Chop and steam the fennel, for example in a bamboo steaming basket like this one (available from your local Asian supermarket):

This will take the longest, about 20 min of steaming (stab a thick piece of fennel to check if it's done).

2. Unpit the olives and cook the couscous (usually levelling it in a shallow dish and pouring some boiling water for it absorb is enough - Kristof used the steaming water from the fennel for more flavour).

3. Pan fry the red mullets in a little olive oil. Assemble all on a plate and drizzle some more olive oil (we used lemon flavoured olive oil which worked very well with this). Enjoy with a glass of white wine:)

Tuesday, 4 November 2014

"Get Well Soon" Chicken Soup


I'm stuck at home with a gastro-enteritis, or as they call it here, "stomach flu".

Unfortunately this is something I tend to get quite a bit (at least once every 2 years, so probably every time there's an epidemic!).
The silver lining is that by now I know how to deal with it! The formula is: lots of rest, lots of water, and only light and "safe" food. That means nothing with fat, too much fibre or spice, basically nothing that can irritate your digestive system further...
The best thing being a nice homemade chicken soup (alternating with some good natural yoghurt for breakfast or tea time).

The soup in the picture above has (for a big pot):
4 carrots 
2 leeks
5 small potatoes
about 600g chicken
about 2l water
2 stock cubes
thyme

The only trick here is to add the ingredients according to their cooking time: so first the carrots while you chop the rest of the veggies, then the potatoes, then a bit afterwards the leeks then the chicken.

Note: I'm going for the chicken being tender because it's cooked but not over cooked, as opposed to boiling the heck out of it then simmering for hours to get it tender again. If you want to do that, obviously put in the chicken first then the veggies a good bit later, otherwise they'll be very very limp...

Note 2: If you're worried about not being sure the chicken is cooked through, split the biggest chicken piece to confirm it is, then leave it on another couple of minutes anyway for good measure (if the fire is low and it's only a few minutes extra it won't toughen up too much).

So that was Chicken Soup #1, here's Chicken Soup #2:


This one has:
4 carrots 
2 leeks
100g baby corn
about 600g chicken
a few black Asian mushrooms (didn't see the type on the packaging)
300g rice vermicelli
about 1cm ginger root
about 2l water
2 stock cubes
a small splash of soy sauce

It was also yummy and comforting (and Kristof was happy I had to skip the chilli  peppers this time!).

Of course this all supposes you are not too sick to cook. If you are, maybe you can point your nearest loved one to this page so they can make it for you?:)
And if they need a little bribe, maybe you can promise to make them some muffins or a strawberry tart later in return...

Friday, 31 October 2014

Delicious Pumpkin Soup

This is by far my favourite soup... soft and creamy and comforting... 
It requires a bit of work peeling and cutting the pumpkin, but I think it's really worth it, and the rest is dead easy.

Ingredients
1 small pumpkin or 1/4 of a big pumpkin (jack 'o lantern type)
3 carrots
2 onions
200ml cream
2 stock cubes (or amount needed for 1l of water)

Preparation
1. Peel the pumpkin, remove the seeds and dice it in rough chunks (you're already over the hard part!), add the carrots and onions.

2. Crumble the stock cubes on top of it, add 1 liter of water, and cook until the vegetables are softened (especially the carrots).

3. Add the cream and blend into a soup.
(Optional: decorate with herbes de Provence, seeds, Parmesan, or whatever takes your fancy!)

A cereal/seeds bread is nice to have with it...


Saturday, 16 August 2014

Pan-fried sardines with fennel, courgette and green pepper


More easy and yummy food!! :)

For 2 people, you will need:
- 2 or 3 sardines
- 1 courgette 
- half a fennel
- a green bell pepper
- oil and spices and/or herbs (I used mild pepper flavoured oil that little peppers stuffed with cheese came in -we ate those before dinner, and the oil tasted too good not to use in something- and ras-el-hanout, a traditional Moroccan spice mix)

Preparation
1. Cut up the veggies and toss them with the oil and spices/herbs.

2. Bake at 230 degrees for 35 min. 
You'll probably want to stir it a bit halfway so it doesn't end up a bit too brown at the top and just about cooked at the bottom like mine...

3. Pan fry the sardines, with a bit of herbs and spices (I added the fennel tops).

Done!


Thursday, 14 August 2014

Easy and Yummy Strawberry Tart

Kristof's team takes turns to make cakes for their Show and Tell meeting, every two weeks (a great habit if you ask me!).

This week was his turn, and since I wasn't around to help (Girls' Night!), I gave him some pointers for an easy strawberry tart I made a few years ago for my birthday. Here's the recipe:

Ingredients

1 pie crust (puff pastry or shortbread)
1 basket of strawberries (about 500g)
1kg of mascarpone
vanilla sugar, to taste


Preparation

1. Unroll the crust in a pie dish, prick it all over with a fork and bake it "blind" according to the packaging's directions (in his case, that was 35min at 210 degrees Celsius).

2. Whisk the vanilla sugar into the mascarpone (Kristof used 4 packs, about 45g, but if you have more of a sweet tooth you might want to add more).

3. When the pie crust has cooled down, fill it with the mascarpone mixture and top it with strawberries.

Ta Dah!


It was yummy and disappeared quite quickly;) 
His colleagues complained that it was bad for their figure (apparently software developers are watching their figure these days!) but still went for seconds and thirds...


And here's the proud cook with his creation:


Sunday, 11 May 2014

Homemade muesli

This is more of a "look how easy it is to do this" than an actual recipe.

I once had homemade muesli in a B&B in Austria, and it was the best muesli I've ever tasted.
After a discussion with my friend/colleague/fellow foodie Shalet as to whether the oats would need to be cooked first, I decided to look it up and try it out.
I used regular oat flakes, and those are fine without prior cooking. With other types of oats (she mentioned steel cut rolled oats, which look pretty different in a google image search), I guess your mileage may vary...

So basically the idea is to just layer the ingredients (your choice of cereals, nuts, seeds, dried fruit...) in the proportions you want, shake, and you're done... 

This is what I used...
You'll probably recognise oat flakes and sunflower seeds, and the thing in the middle is a mix of dried fruits and nuts from the local supermarket (it has dried apples, apricots, cranberries and raisins, plus hazelnuts, Brazil nuts, pistachios and almonds).

So here it is:
Layer...
Shake...
And done...

And it's very yummy, much nicer than supermarket muesli that sometimes tastes a bit cardboard-y.